To use a PNG for sublimation, you need more than a transparent image. The printer, ink, transfer paper, heat equipment and substrate must form a compatible process, and the artwork must fit the actual printable area.
Choose Autumn Animal Leaf Pressing Club for a small transfer composition, or Watercolor Winter Hare Evergreen Postcard Studio for a second seasonal composition. Both are paid PNG artwork collections for layouts you design yourself; add your own text, shapes and measurements.
Make it with these Bokaja sets
Choose the style that fits your project. These are digital PNG artwork collections: add your own text and build the layout shown in this guide.

Autumn Animal Leaf Pressing Club
Autumn artwork for a small transfer composition.

Watercolor Winter Hare Evergreen Postcard Studio
Winter artwork for a second seasonal composition.
Worked example: a 3-inch sublimation test composition
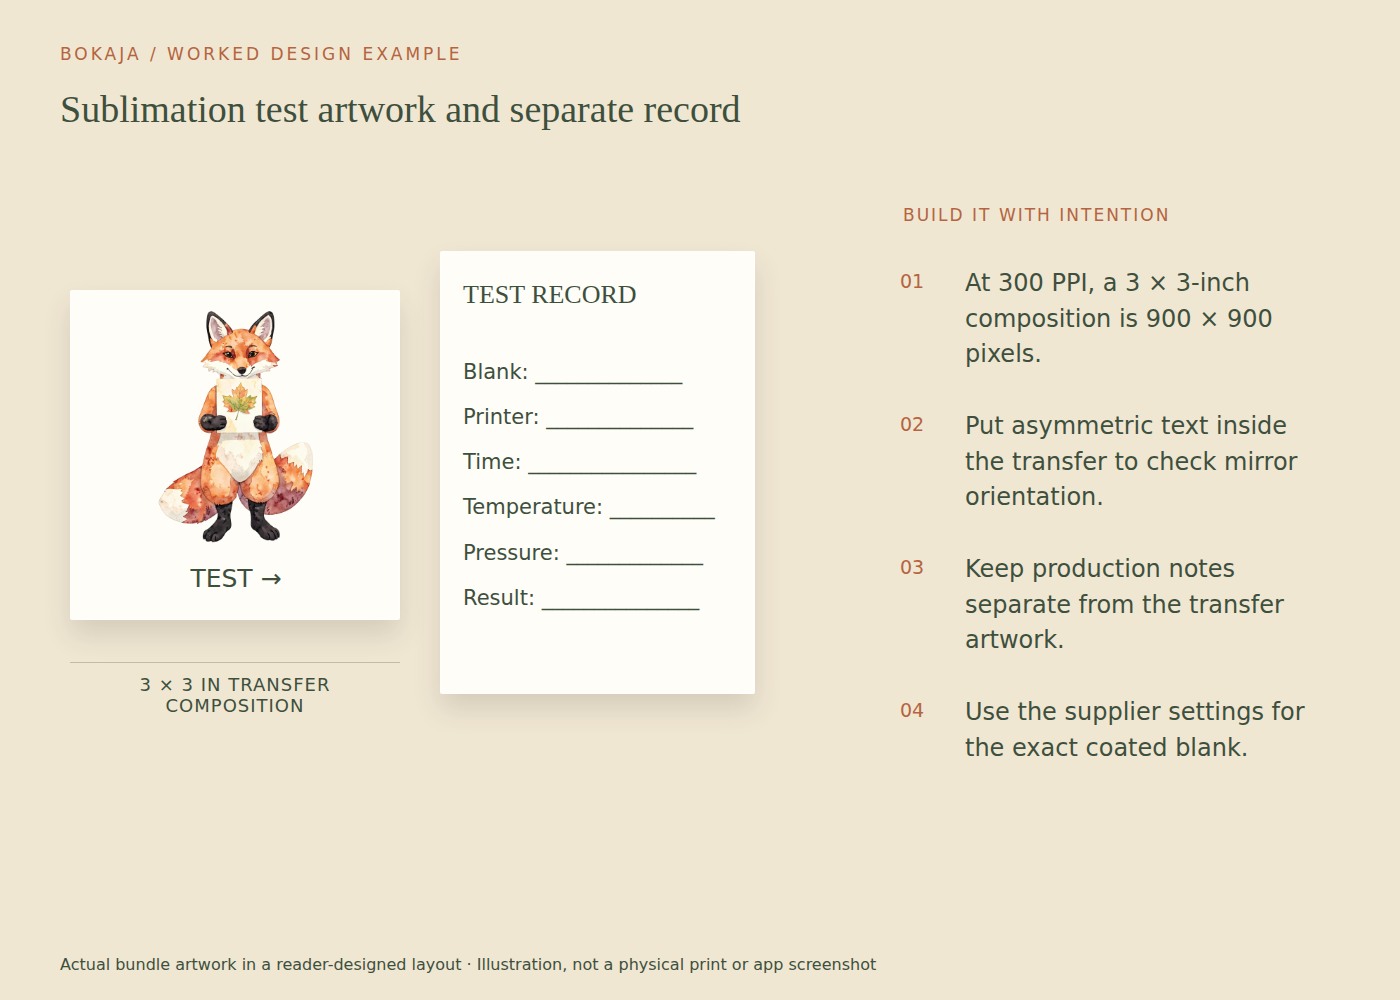
Start with a blank whose manufacturer allows the sublimation process you have, then use its stated printable area and pressing instructions. For the artwork-planning example, create a 3 × 3-inch composition at 900 × 900 pixels, which corresponds to 300 PPI.
Place one autumn PNG inside the composition and add your own short asymmetric text, such as “LEFT,” on a separate text layer. The text is a diagnostic aid for checking orientation; it is not part of the artwork bundle. Keep it in a dedicated test version rather than accidentally leaving it in a customer design.
Inspect the useful pixels in the placed illustration and leave the required safe space for the actual blank. A 3-inch square canvas does not mean every mug, coaster or fabric area accepts a 3-inch square print. A curved or shaped product may need a different template and placement.
Before printing, confirm where mirroring occurs in your workflow. If the design application and driver both mirror, two flips cancel each other. If neither does when the transfer process requires it, the text can end up reversed. Use the material and equipment instructions to set the correct single route.
Record one test at the manufacturer’s starting settings: blank model, ink, paper, temperature, time, pressure guidance and orientation. Change one supported variable at a time if the result needs adjustment. A dull transfer, blurred edge and ghosted duplicate are different symptoms and should not all be treated by increasing heat.
Judge the result after the recommended cooling and handling process. Save a photograph and your notes for comparison, but do not infer wash durability or broad product suitability from one appearance check. Those claims require the relevant physical testing for the finished item.
Check the complete material system
Confirm that the printer is suitable for the sublimation process you intend to use and that the ink and paper are appropriate for that setup. Follow the equipment and consumable manufacturers’ guidance rather than mixing products based only on their names.
The substrate matters just as much. Conventional dye-sublimation workflows commonly require suitable polyester content or a compatible polymer coating. An ordinary cotton shirt or uncoated mug is not automatically equivalent to a blank sold for sublimation.
Read the blank supplier’s instructions, including any surface preparation, pressing and cooling requirements. If the instructions are missing or contradictory, resolve that before using the item for a paid order.
Obtain the actual print-area dimensions
Measure the intended area and compare it with the supplier’s template where one is provided. A mug’s usable area is not simply its full circumference, and a shirt’s comfortable design placement is not every available square inch of fabric.
Account for handles, seams, curves and other areas the process may not reproduce consistently. Use the specified safe area rather than placing important text at the edge of the maximum template.
Create the design document at the intended dimensions before importing the PNG. This avoids building a small composition and enlarging it later.
Plan color and contrast for the substrate
Use the actual blank color when considering the design. A pale character can lose definition on a similarly colored surface, and bright screen colors may not reproduce identically in the finished transfer.
Do not judge the process solely from the appearance of the transfer paper before pressing. Follow the supplier’s guidance and evaluate the completed, cooled test under consistent lighting.
Keep an untouched artwork master. If you make color adjustments for one production setup, save them as a separate version so the source remains available for another substrate or provider.
Confirm orientation and output settings
Many sublimation transfer workflows require mirroring the design before printing. Check the instructions for your specific process and confirm that mirroring is applied once, not twice by both the application and driver.
Use a test word or directional mark in a disposable proof when checking orientation. A symmetrical illustration can hide an incorrect mirror setting until you add a name.
Follow the recommended print and color-management settings. Do not combine several unverified corrections and then treat the result as a repeatable recipe.
Make a controlled physical test
Use the real ink, paper, blank and equipment intended for production. Follow the blank and equipment instructions for heat, time, pressure, placement and cooling. Use appropriate heat protection and ventilation as specified by the products involved.
Record the file version, dimensions, materials and settings. Inspect the finished item for placement, color, ghosting, uneven transfer and readable small details.
If the result is poor, change one relevant variable at a time. A random combination of extra heat and extra pressure can damage the blank without identifying the cause.
Separate appearance from durability claims
A transfer that looks good immediately is not proof of wash resistance, dishwasher suitability or long-term durability. Follow the blank supplier’s care guidance and perform appropriate product testing before making claims to customers.
Review the current Bokaja licence before selling finished goods. You can inspect a free PNG sample while planning the artwork, but a digital sample does not verify your physical sublimation process. The first useful milestone is a documented result on the actual material—not simply a completed screen layout.
Your next step
Keep the test composition, settings and result together. Use a successful appearance test to guide the next controlled test, not as evidence for durability claims you have not checked.
Start with Autumn Animal Leaf Pressing Club, or choose Watercolor Winter Hare Evergreen Postcard Studio for the alternative theme described above. These collections supply PNG illustrations for your own layout; the project text and construction remain yours.