Prepare PNG files for print on demand by working backward from the provider’s current product specification. The right canvas, safe area and file requirements depend on the exact product and variant, not just on the fact that the artwork is a PNG.
Choose Autumn Animal Leaf Pressing Club for a seasonal physical-product layout, or Watercolor Christmas Robin Gift-Wrapping Studio for a second physical-product layout. Both are paid PNG artwork collections for layouts you design yourself; add your own text, shapes and measurements.
Make it with these Bokaja sets
Choose the style that fits your project. These are digital PNG artwork collections: add your own text and build the layout shown in this guide.

Autumn Animal Leaf Pressing Club
Autumn artwork for a seasonal physical-product layout.

Watercolor Christmas Robin Gift-Wrapping Studio
Holiday artwork for a second physical-product layout.
Worked example: fit a small illustration into a larger POD area
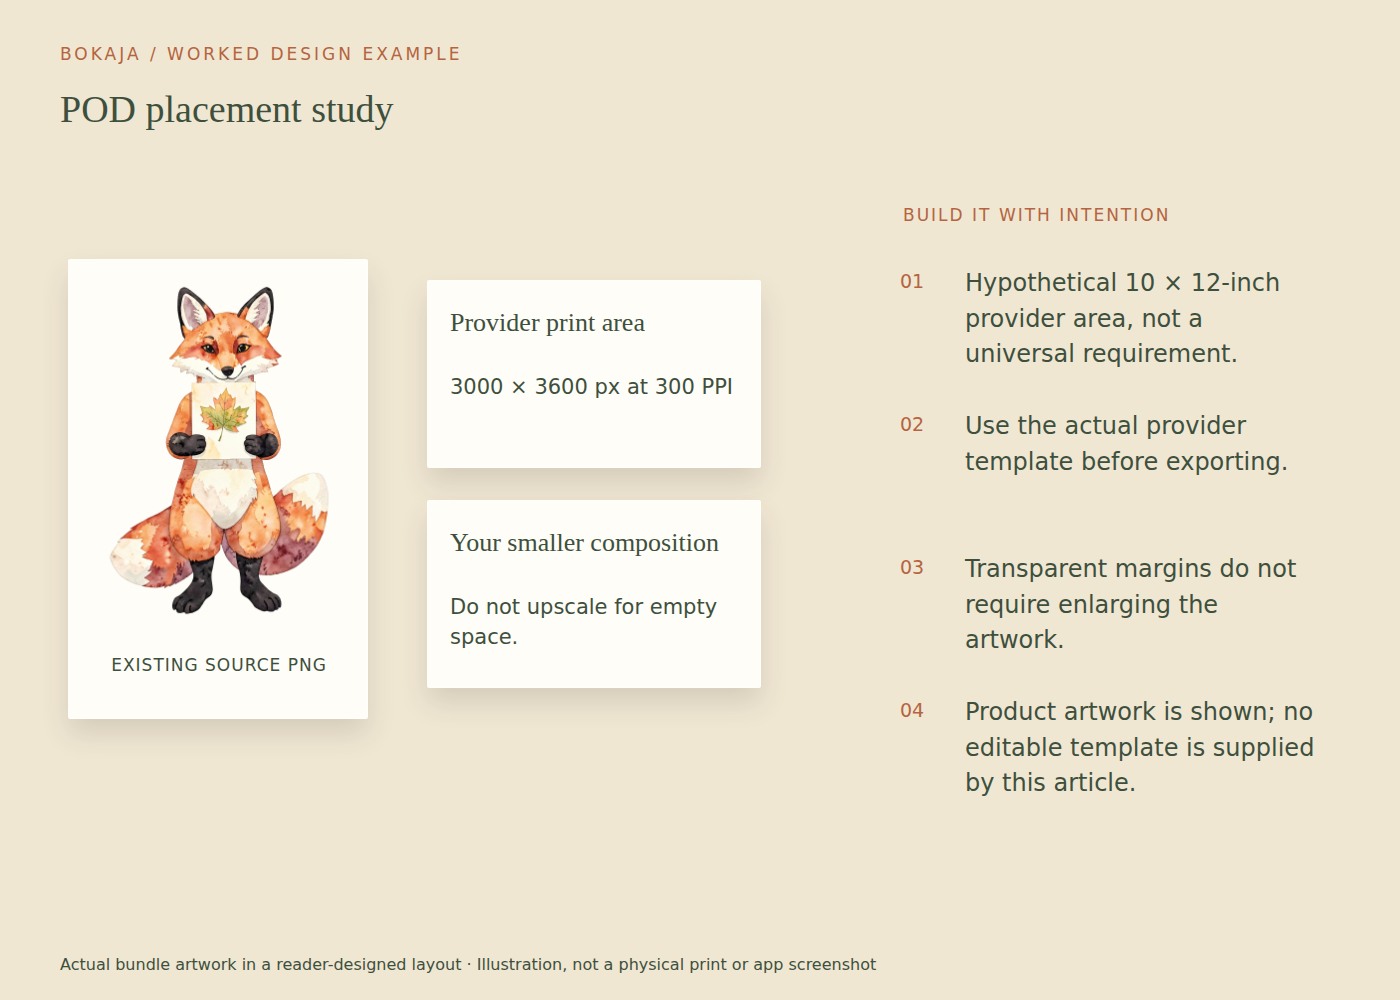
Assume a provider specifies a 10 × 12-inch design area at 300 PPI for one particular product. That would mean a 3000 × 3600-pixel canvas. These are example numbers, not a universal upload specification; use the current template for your exact provider, product and variant.
You want a 6-inch-wide autumn illustration with reader-created type above it. Suppose the visible illustration measures 2400 pixels across in the source. At 6 inches, it has 400 effective PPI: 2400 ÷ 6. Stretching the same subject to 10 inches would reduce it to 240 PPI. The canvas may be large enough while the placed artwork still needs a separate check.
Keep the illustration at 6 inches if that suits the composition and provider requirements. Use the surrounding area for intentional spacing and your own typography rather than enlarging the PNG just to fill the upload rectangle. Preserve the safe area from the provider template, and remove any template guides from the production export.
Check how transparency interacts with the chosen product color. Empty PNG pixels do not print as white ink by themselves. A provider’s garment-printing process may add an underbase under colored artwork, but its behavior and available products depend on the service. Inspect the provider preview and order the appropriate physical sample before making appearance claims.
Keep a separate project record for each variant. A placement that works on one size or product shape may not transfer unchanged to another. Save the exact template version, export dimensions, illustration size and sample notes.
Before uploading, confirm that the artwork licence permits your specific outside-production arrangement. Do not place the source art into a reusable public asset library or assume a general physical-product permission covers every platform’s terms.
Choose one product before building the file
Select the actual provider, product and variant you intend to offer. A mug, a shirt and a tote bag have different printable areas and production processes. Even two products with similar names can use different templates.
Download or record the current specification from the provider. Note the required dimensions, accepted format, resolution guidance, safe area, bleed if relevant and any color-profile instructions.
Keep the specification date with the project. If the provider changes the product or template later, you will know which version your file was built for.
Check the licence against the delivery route
Write down who receives the production file and what rights the platform requests. Is the file used only to manufacture your ordered end-products, or does it enter a reusable asset library or a marketplace resource collection?
The current Bokaja licence permits small-business physical end-products but prohibits source redistribution and uploads as digital assets to specified libraries and marketplaces. If your exact provider arrangement is not clearly covered, ask for clarification before uploading or listing.
Do not assume that flattening several PNGs together removes all licence restrictions. The permitted use remains a question of the applicable terms, not just file structure.
Build at the provider’s dimensions
Create a document matching the required canvas. Place the provider’s safe-area guide in a separate working layer if the tool supports it, and make sure that guide is not included in the final artwork unless instructed.
Keep important text and faces inside the safe area. Background art may extend differently where bleed is required, but the provider’s specification should decide that treatment.
For clothing, consider how the artwork will look on different sizes and colors. A single centered mockup does not establish that the placement looks balanced on every variant.
Plan transparency and garment color deliberately
Verify the PNG over a colored background. An accidental white rectangle can become a visible printed block. Conversely, an intended white detail may depend on the provider’s printing process and its treatment of white ink.
Check the provider’s guidance for the exact product and substrate color. Do not assume that a design prepared for a white shirt will have equal contrast on black, gray and pastel variants.
Limit the initial variants to those you can meaningfully review. More color choices create more combinations that may need checking.
Export a clean production file
Use the requested format, dimensions and profile. Exclude guides, crop marks or backgrounds unless the provider asks for them. Open the exported file independently to check transparency, edges and complete text.
Give the file a descriptive version name that includes the product or template reference. Keep the editable master and source artwork separate from the upload folder so the wrong file is less likely to be sent.
Review the provider’s preview, but treat it as a placement aid rather than a complete quality test.
Order and inspect a physical sample
Order a sample of the actual product before relying on physical-quality claims in a broad launch. Check placement, print detail, color, material feel and the information supplied with the item. Follow appropriate care testing before making durability claims.
Do not present a generated or provider mockup as a photograph of a product you have personally inspected. Label marketing images honestly and avoid claims such as “tested” until the test has happened.
Keep a product-specific record
Save the specification, approved file version, licence clarification if needed and sample observations together. Recheck when the provider, blank, template or artwork changes.
Your next step
Keep each product variant linked to its own template, export and sample record. Do not let an attractive provider mockup replace a check of the physical result.
Start with Autumn Animal Leaf Pressing Club, or choose Watercolor Christmas Robin Gift-Wrapping Studio for the alternative theme described above. These collections supply PNG illustrations for your own layout; the project text and construction remain yours.