A hot chocolate bar sign should help guests understand what is available, how to serve it and where to find ingredient information. Make the menu clear before adding winter clipart. A decorative title alone does not explain the actual drink choices or toppings.
Choose Snowman Cocoa Cart Winter Market for the menu heading, or Snowman Cocoa Delivery Club for matching table tags. Both are paid PNG artwork collections for layouts you design yourself; add your own text, shapes and measurements.
Make it with these Bokaja sets
Choose the style that fits your project. These are digital PNG artwork collections: add your own text and build the layout shown in this guide.

Snowman Cocoa Cart Winter Market
Cocoa-cart artwork for the menu heading.

Snowman Cocoa Delivery Club
Cocoa-delivery artwork for matching table tags.
Worked example: an 8 × 10-inch cocoa menu with three clear groups
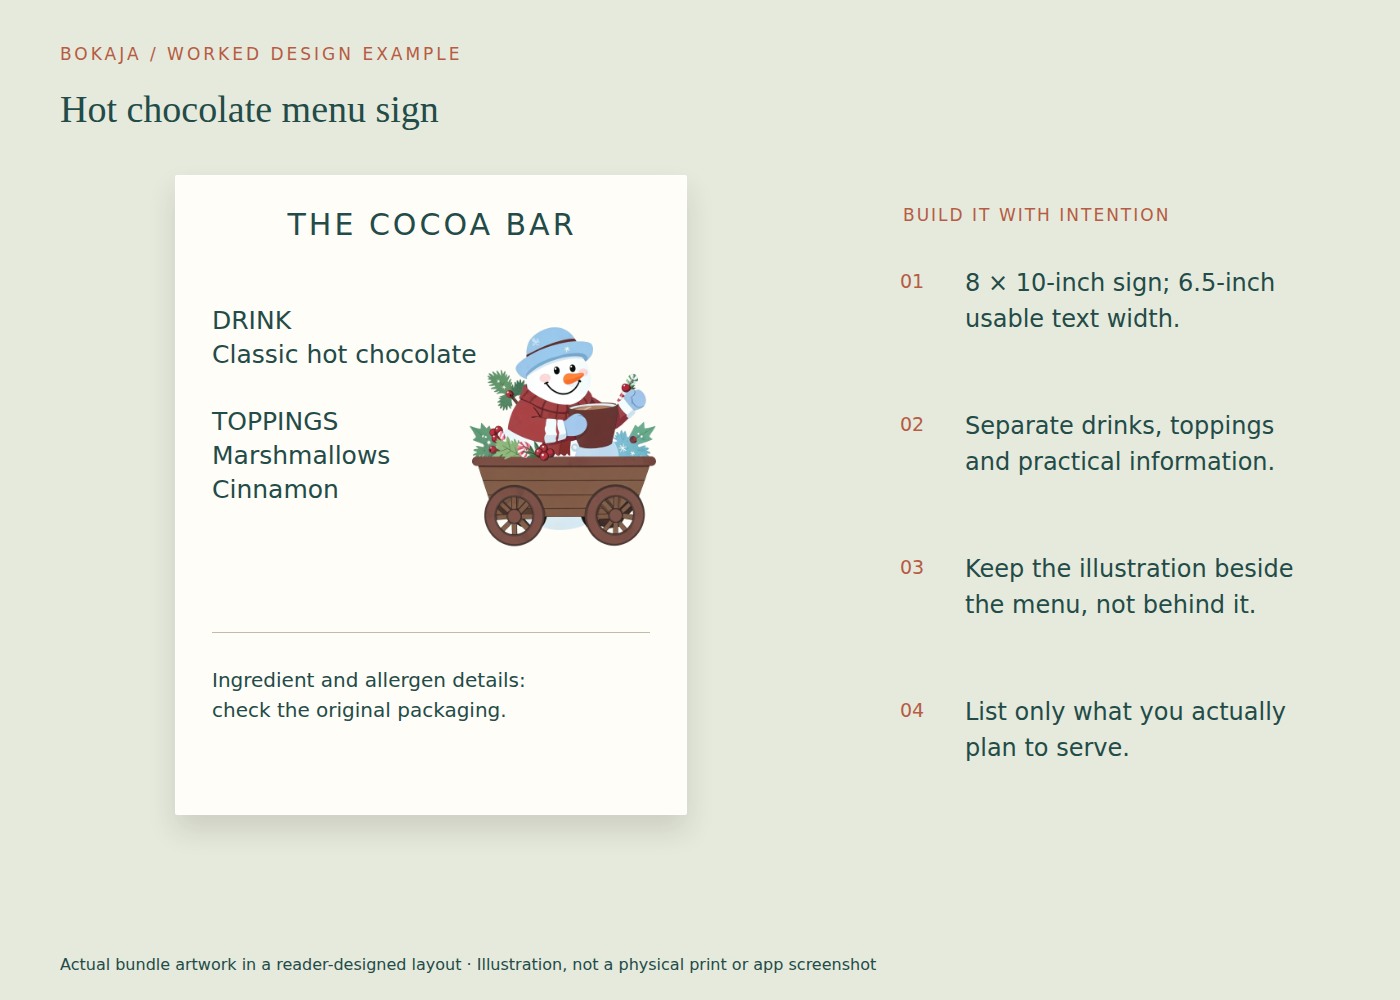
Use an 8 × 10-inch page and keep the main text inside 0.75-inch side margins, giving a 6.5-inch text width. Place a small cocoa-cart PNG near the heading; the drink choices and instructions should remain readable without looking through artwork.
Create three groups: Choose your drink, Add a topping and Before you pour. Write only the options actually present. For a fictional layout, the first group might contain “Hot chocolate” and “Warm milk,” but replace these with your real menu and preparation details before printing.
Give the heading roughly 1.5 inches of height, the drink and topping groups about 2 inches each, and a practical-information block below. Start the main menu entries around 18–24 points and test from the distance at which a guest will stand. If the frame hides part of the page, move the content inward rather than assuming its nominal size is the visible opening.
Use the practical block for a concise, accurate direction such as where to find ingredient information and who serves hot drinks. Keep original ingredient packaging or a reliable ingredient list available. Do not label a topping allergen-free unless that claim has actually been established for the product and serving arrangement.
Make small matching labels only for items that need identification. Reuse the cocoa-delivery collection if you want an alternative illustration, but keep the same plain text treatment across the table.
Place a proof in the actual holder beside cups and topping containers. Check sightlines: a tall jar may hide the bottom instructions even when the page itself is well designed. Move the holder or rearrange the table before making the text smaller. A clear menu is part of the serving setup, not just a standalone print.
List the real options
Write down the drinks, milk options, toppings and any separate serving steps. Use plain names before inventing playful ones. Guests need to know whether a container holds cocoa mix, marshmallows or chocolate pieces.
Check the actual packaging or recipe information. Do not label an option dairy-free, vegan, gluten-free or allergen-free unless the ingredients and preparation genuinely support that statement. Keep relevant packaging or an accurate ingredient list available.
If you cannot control cross-contact in the serving area, do not imply that separate bowls alone establish an allergen-safe station.
Decide what belongs on the main sign
The main sign can show a short title, a simple serving sequence and where to ask questions. Individual containers should have their own clear labels if their contents are not obvious.
For a fictional layout example, the structure might be:
Hot Chocolate Station
- Ask the host for a cup of the prepared drink.
- Choose from the labeled toppings.
- Ask before serving if you need ingredient information.
Replace these instructions with the actual supervised serving arrangement. Do not copy them if guests are expected to prepare the drink in a different way.
Keep safety instructions readable
Hot drinks and heating equipment need an appropriate setup and supervision. Place the station where it does not obstruct movement, and follow the equipment manufacturer’s instructions.
If children are present, make the adult-help instruction clear and manage access to hot liquids accordingly. A cute sign is not a substitute for supervision or safe placement.
Avoid decorating the area with loose paper near heat sources. Keep cords, spill risks and container stability in mind when planning the physical display.
Add artwork around the information
Choose one small winter or food illustration and a restrained border. Leave the main text area quiet. Avoid putting a detailed scene behind the serving steps.
The related snowman cocoa-bar guide offers a seasonal theme context. Your sign should still be designed around your own menu and venue rather than copied as a generic promise.
Proof with the complete setup
Print one sign and place it in the holder beside the actual containers. Check for glare, hidden text and a stable position. Ask someone unfamiliar with the plan to explain how they would get a drink.
If they guess incorrectly, revise the wording or arrangement. Clear container labels and a sensible physical sequence often solve more problems than adding another paragraph to the sign.
Check that the final print matches the current ingredients. If a topping changes at the last minute, update its label rather than leaving an attractive but inaccurate description in place.
Keep the reusable parts separate
Save a master with the title, layout and artwork, but keep event-specific ingredients and instructions editable. Store a plain checklist of what must be rechecked before the next use.
For print sizing and export, the Canva PNG workflow can help. Review the current artwork licence before selling printed signs or sharing digital layouts. The finished sign should make the real station easier to use, not merely make a photograph of it look complete.
Your next step
Save the layout independently from the menu wording. Recheck ingredients, serving instructions and holder visibility every time the cocoa station changes.
Start with Snowman Cocoa Cart Winter Market, or choose Snowman Cocoa Delivery Club for the alternative theme described above. These collections supply PNG illustrations for your own layout; the project text and construction remain yours.