A blurry PNG is usually being enlarged too far, viewed through a low-quality preview, or exported with fewer pixels than the project needs. Sometimes the blur is already in the source. Find the stage where detail disappears before applying sharpening or downloading another converter.
Choose Storybook Pencil & Book Club for a small bookmark, or Autumn Woodland Deer Acorn Library for an alternative bookmark. Both are paid PNG artwork collections for layouts you design yourself; add your own text, shapes and measurements.
Make it with these Bokaja sets
Choose the style that fits your project. These are digital PNG artwork collections: add your own text and build the layout shown in this guide.

Storybook Pencil & Book Club
Book-themed artwork for a small bookmark.

Autumn Woodland Deer Acorn Library
Woodland reading artwork for an alternative bookmark.
Worked example: diagnose a soft 2 × 6-inch bookmark
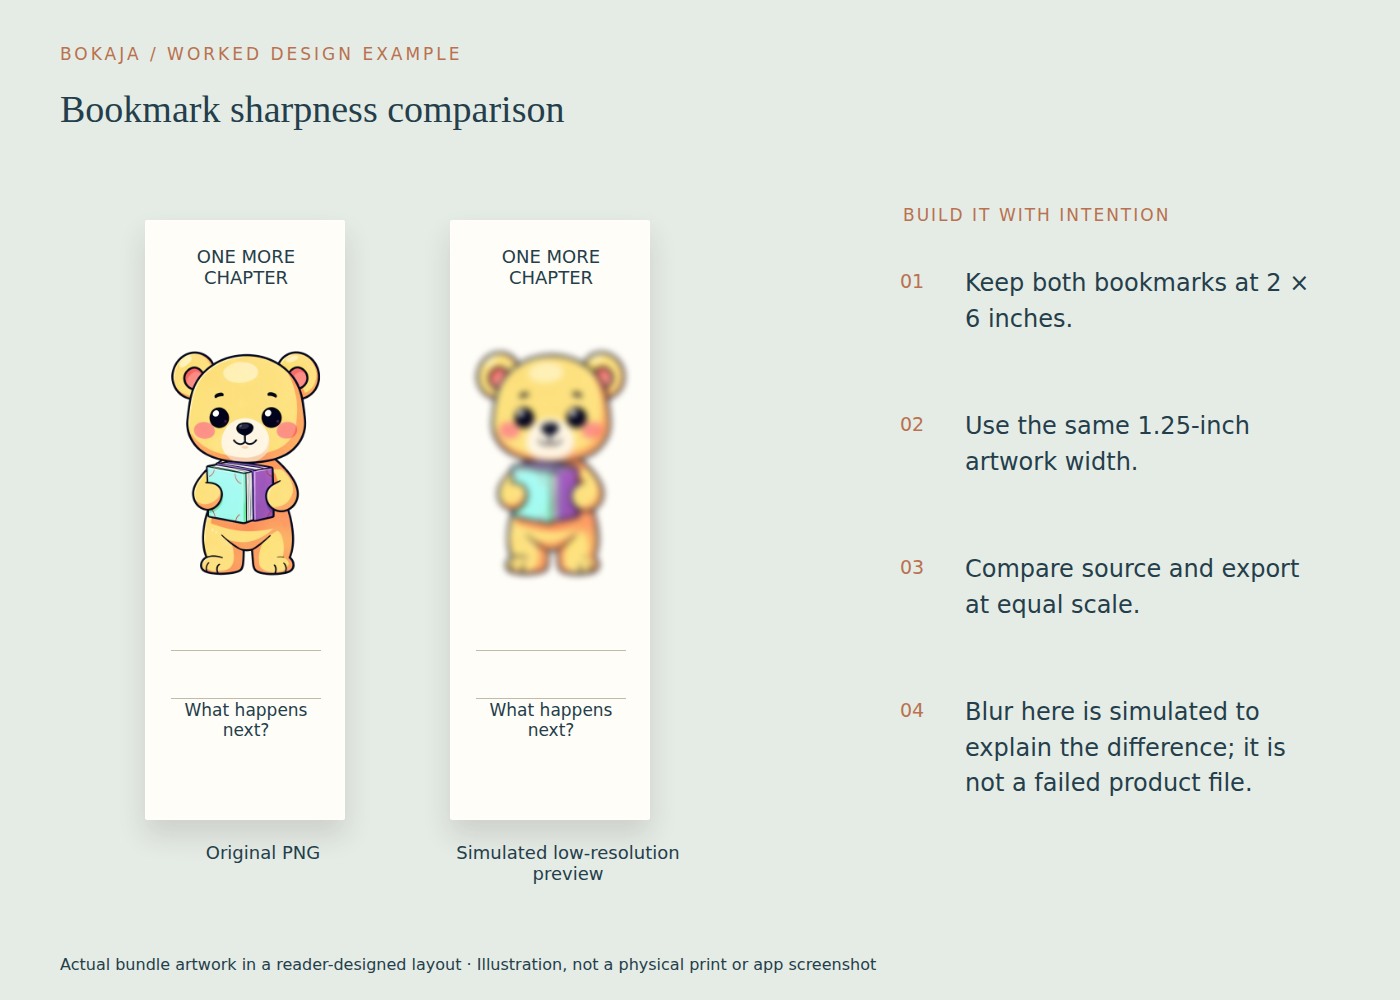
Create a bookmark with a 1.25-inch-wide book-themed illustration and a short reader-written prompt. A full-page PNG export at 300 PPI should be 600 × 1800 pixels. The illustration’s occupied width needs about 375 pixels to achieve 300 PPI at 1.25 inches: 1.25 × 300.
Suppose the original visible artwork measures 2400 pixels across. You have ample source pixels for that small placement. If the finished bookmark is blurry, purchasing a larger file is unlikely to fix the real bottleneck.
Check the export dimensions next. If the page came out at 200 × 600 pixels, the whole bookmark is only 100 PPI at 2 × 6 inches. Its 1.25-inch illustration is represented by roughly 125 pixels across in that export, however large the original was. Re-export from the measured working document at the required pixel dimensions; do not simply enlarge the 200 × 600 file.
If the export is 600 × 1800 but only the text looks soft, inspect how the text entered the document. Typed text and a screenshot of text are not equivalent sources. Recreate screenshot lettering as live text where practical. If only the app preview is soft, open the actual export in another image viewer before changing anything.
Finally, print the bookmark at actual size and compare the smallest text and artwork edge. Keep the image placement fixed during this diagnosis. Changing the source, the size and the export setting at once makes it impossible to identify the improvement. Save the successful page dimensions and export recipe with the bookmark master so the next batch does not start from the low-resolution version.
Check the original at a sensible zoom
Open the actual downloaded PNG, not a marketplace preview or an image copied from a web page. View it around 100 percent, where one image pixel is represented approximately by one screen pixel, subject to the application and display scaling.
Look at thin lines, small facial features and high-contrast edges. If those are already soft, the source may be low-detail or intentionally painterly. A larger export cannot recover crisp linework that never existed.
Do not mistake visible pixels at extreme magnification for a defect. Every raster image eventually shows its grid. Conversely, a tiny on-screen thumbnail can look sharp while concealing a poor source.
Calculate how far you are enlarging it
Find the pixel width and divide it by the planned printed width in inches. A 900-pixel illustration printed 3 inches wide gives 300 effective PPI. The same illustration at 9 inches gives 100 PPI.
For small close-viewed paper products, 300 PPI is a useful initial planning target, though the printer’s specification and the image style matter. A rough texture may tolerate a different density from small text. The print-size calculation guide explains the arithmetic without relying on a “300 DPI” label.
Also inspect transparent padding. A large canvas with a tiny character in the center may contain fewer useful subject pixels than its overall dimensions suggest.
Separate preview blur from export blur
Design applications sometimes display a reduced-quality preview while you edit. Before rebuilding the layout, export a small test at the intended output settings and inspect that file independently.
If the export is clear but the editor looks soft, the preview is the likely issue. If the original is clear and the export is soft, review the document size, export dimensions and any intermediate files. If both are soft, return to the source or reduce the printed size.
A screenshot is not a substitute for exporting the design. It captures the screen’s available pixels and may include scaling, interface elements or compression from a messaging application.
Watch the export chain
Each additional conversion is another opportunity to reduce dimensions or flatten transparency. A workflow such as PNG to small JPEG to screenshot to PNG does not preserve the original quality merely because the last extension is PNG.
Repeated PNG saves do not inherently introduce JPEG-style compression loss: PNG compression is lossless. The risks here are resizing, destructive edits and conversions to other formats. Export directly from the best available working document. Inspect the final file’s actual pixel dimensions. If the app offers a resolution or size control, confirm the result rather than assuming its default matches your print target.
Keep an original master and create project-specific exports from it. Avoid repeatedly saving over the only good source while experimenting.
Know what sharpening and upscaling can do
Sharpening increases local edge contrast. It can make a mildly soft image appear crisper, but strong settings create halos and brittle-looking edges. Upscaling adds pixels by interpolation or prediction; it does not establish that the new detail matches the original artist’s intent.
For an important print, the most reliable options are often a larger source, a smaller placement or a layout that gives the image more surrounding space. Do not hide a quality problem behind a nominally larger file size.
Make a targeted proof
Print a small crop containing the finest detail at the final intended scale. You do not need to waste a full sheet on repeated versions of the whole design. Compare the crop under normal viewing conditions, then choose the acceptable size before arranging a batch.
Your next step
Keep the sharp export and its settings together. If another version looks soft, compare its dimensions against that known file before editing the original artwork.
Start with Storybook Pencil & Book Club, or choose Autumn Woodland Deer Acorn Library for the alternative theme described above. These collections supply PNG illustrations for your own layout; the project text and construction remain yours.
For commercial or shared deliverables, check the current artwork licence for the intended use.