If a printable comes out too small or too large, check three places: the document’s physical page size, the print dialog’s scaling setting and the paper size selected in the printer driver. A correct-looking preview does not guarantee a correctly measured print.
Choose Watercolor Christmas Robin Gift-Wrapping Studio for a measured tag, or Watercolor Winter Hare Evergreen Postcard Studio for a second measured tag. Both are paid PNG artwork collections for layouts you design yourself; add your own text, shapes and measurements.
Make it with these Bokaja sets
Choose the style that fits your project. These are digital PNG artwork collections: add your own text and build the layout shown in this guide.

Watercolor Christmas Robin Gift-Wrapping Studio
Gift-wrapping artwork for a measured tag.

Watercolor Winter Hare Evergreen Postcard Studio
Winter postcard artwork for a second measured tag.
Worked example: a gift tag that is 5% too small
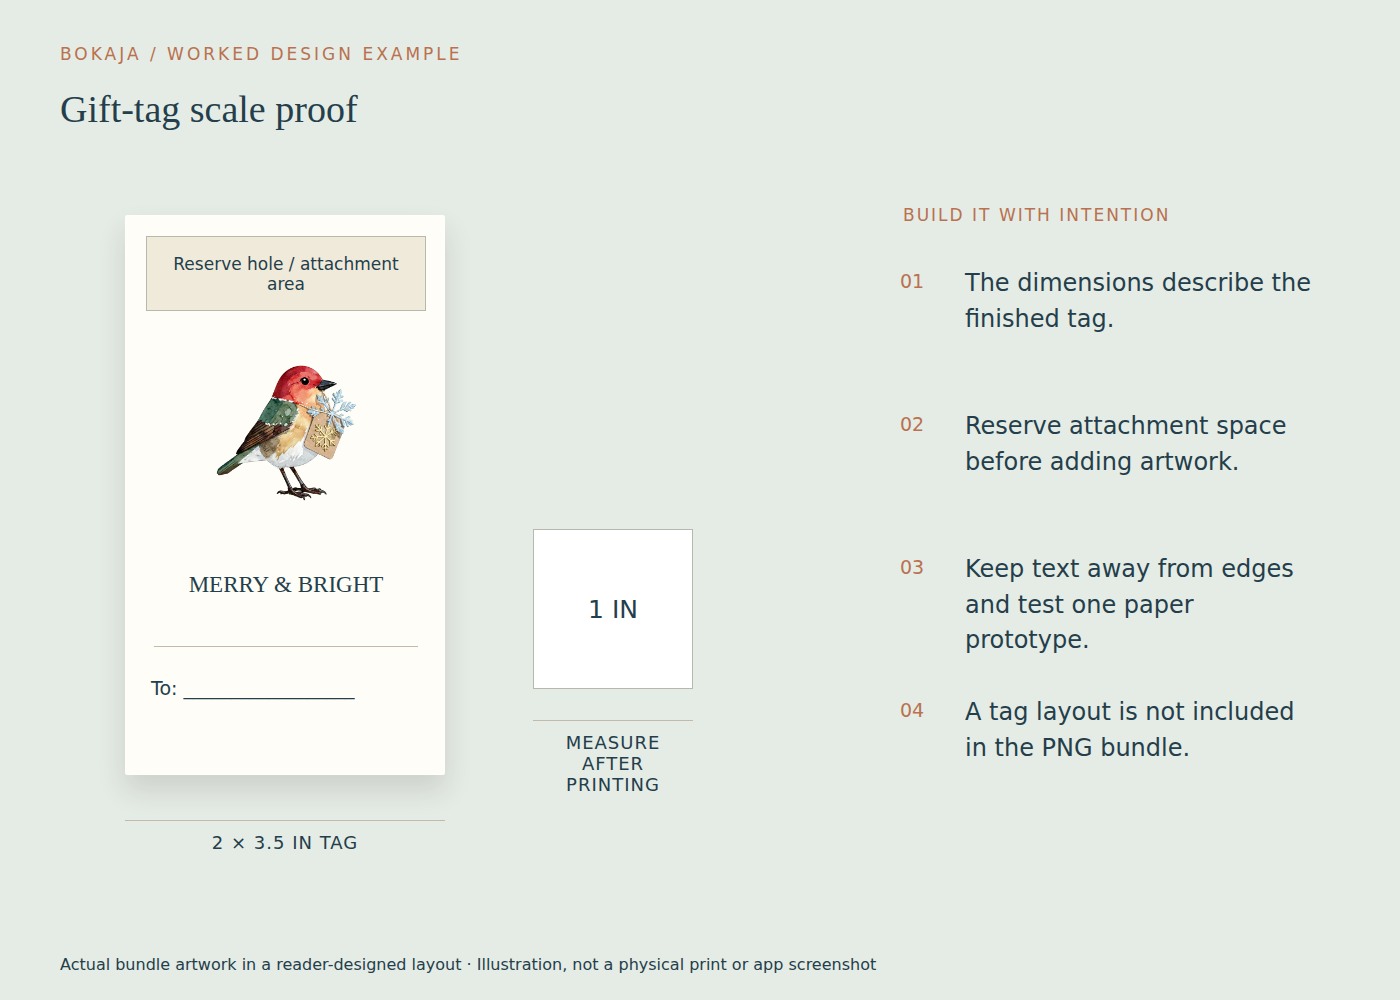
Your design is a 2 × 3.5-inch gift tag. On a proof copy, place a separate 1-inch square beside it. Print, then measure the square in both directions and the tag’s cut rectangle.
Suppose the square measures 0.95 × 0.95 inch. The tag should then be about 1.9 × 3.325 inches if the whole page was uniformly reduced to 95%. Those matching proportions point toward a scaling setting rather than an incorrectly drawn tag.
Check the exported page size first. If the tag sits on a Letter page, the print dialog should be working with that page, not treating a cropped tag image as a full sheet. Select actual size or 100% when the page fits the printer’s usable area. Confirm Letter versus A4 in both the application and driver, and disable a borderless expansion mode if it is inappropriate for measured labels.
You could calculate 100 ÷ 95 = 105.263% as a compensating enlargement, but do not make that your first fix. It would conceal the original reduction and create an oversized print if another application later prints the file correctly. Correct the print path, then measure a fresh square.
If the square is right but the artwork seems too small, inspect transparent padding around the PNG. The tag’s physical size may be correct while the visible illustration occupies only part of its image box. Scale the illustration intentionally inside the unchanged tag; do not enlarge the whole page.
Save the successful settings with the tag master and remove the diagnostic square from the final sheet. Keep a proof version containing it for the next printer or paper change. This gives you a quick measurement check without redesigning the project each time.
Verify the document itself
Check the actual page dimensions in the source and exported file. A 5 × 7-inch design placed in an A4 document is not the same thing as a 5 × 7-inch PDF page. Either can be printed correctly, but the setup must match your intention.
A4 and US Letter are different sizes. A4 is 210 × 297 millimeters; Letter is 8.5 × 11 inches. Switching between them can trigger automatic fitting or clipping.
For an image file such as PNG, the application must interpret how many pixels correspond to a printed inch. If that interpretation is unclear, place the PNG in a document with explicit physical dimensions before printing. The PNG size guide explains the pixel-to-inch calculation.
Inspect the scaling option
Print dialogs commonly offer options resembling actual size, fit, shrink oversized pages or a custom percentage. Their names vary, so read the preview and application help for your setup.
If exact dimensions matter, begin with actual size or 100 percent, provided the design fits within the printer’s printable area. A fit option may reduce the page to accommodate margins. A borderless option may enlarge the image slightly to avoid white edges.
Do not compensate immediately by scaling the artwork to 103 percent. First identify why the printer is applying a change. Otherwise, a later settings correction could make your compensated file wrong in the opposite direction.
Account for nonprintable margins
Many home printers cannot print to every edge of every paper size. At actual size, content outside the supported area may be clipped rather than scaled. That does not mean actual size is broken; it means the layout and printable area do not match.
Move essential content inward, use a larger sheet and trim, or choose a supported borderless workflow when appropriate. Check the printer’s instructions for the exact paper and mode.
For a commercial printer, use its bleed and safe-area specification. Bleed extends background artwork beyond the trim edge; it is not a reason to enlarge all text and illustrations indiscriminately.
Check for a second layer of settings
An application’s print dialog and the operating system or printer driver may both influence paper selection and scale. Confirm that they agree on the paper loaded in the tray.
Also check whether you selected multiple pages per sheet, booklet printing or a photo layout preset. Those modes intentionally rearrange or resize content. They are useful when chosen deliberately, but confusing when inherited from an earlier job.
Print the same small reference after changing one setting. Keeping the test consistent makes the result easy to compare and avoids wasting full sheets of artwork.
Treat cutting-machine prints separately
For Print Then Cut, use the supported application’s print process and preserve its registration geometry. Do not independently resize the registered sheet to make it “fit better.” That can separate the printed image from the cut positions expected by the machine.
If the supported area is too small, resize the project inside the cutting workflow or reduce the number of pieces. Follow the current machine-specific instructions rather than adapting an unrelated PDF-printing workaround.
Save a repeatable print recipe
Once the reference measures correctly, print one finished item and check its fit in the real use: a tag on a bag, a label on a bin, or a card inside its envelope. Physical fit is the final test.
Record the document size, paper size, scale and any borderless setting with the final file. That short note is more useful for the next batch than a folder full of unexplained versions named “final2” and “final-really-final.”
Your next step
Keep a proof-only version with the measurement square. Use it after changing printer, paper or application, and remove it from the finished gift-tag sheet.
Start with Watercolor Christmas Robin Gift-Wrapping Studio, or choose Watercolor Winter Hare Evergreen Postcard Studio for the alternative theme described above. These collections supply PNG illustrations for your own layout; the project text and construction remain yours.
For commercial or shared deliverables, check the current artwork licence for the intended use.