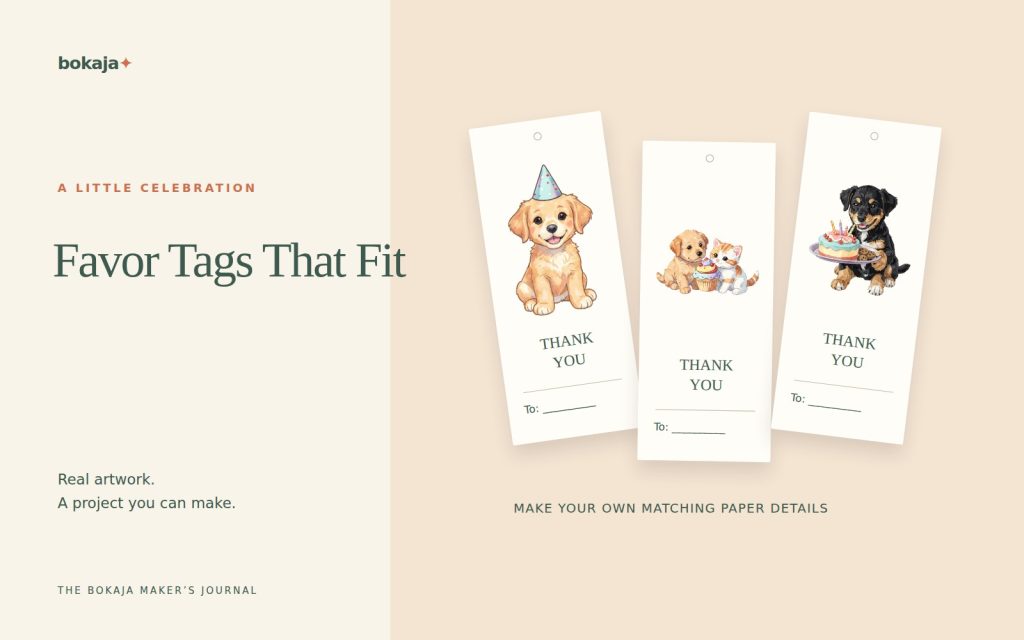
Party favor tags should fit the packaging, carry a short readable message and attach without hiding important information or damaging the gift. Measure the actual bag or box first. A tag that looks balanced on a blank page may be too large once it hangs from a small favor.
Choose Puppy Birthday Bakery for a treat-bag tag, or Dinosaur Birthday Adventure for a matching party tag. Both are paid PNG artwork collections for layouts you design yourself; add your own text, shapes and measurements.
Make it with these Bokaja sets
Choose the style that fits your project. These are digital PNG artwork collections: add your own text and build the layout shown in this guide.
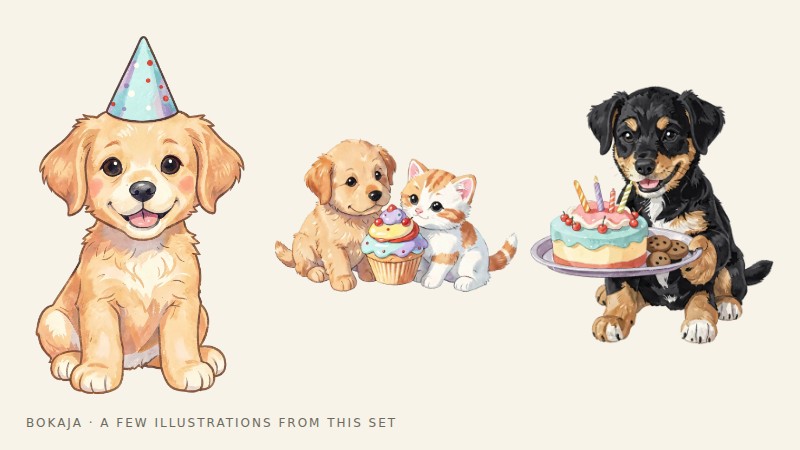
Puppy Birthday Bakery
Puppy birthday artwork for a treat-bag tag.

Dinosaur Birthday Adventure
Dinosaur birthday artwork for a matching party tag.
Worked example: a 2 × 3.5-inch hanging favor tag

Cut a blank 2 × 3.5-inch rectangle and hold it against the real favor bag. If it covers the closure or looks larger than the gift, reduce the format before doing the detailed design. Use the puppy-birthday PNG as a small accent and write the thank-you text yourself.
Reserve the top 0.5 inch for the attachment area. Keep the remaining content inside 0.2-inch side margins, giving a 1.6-inch text width. Place a 1-inch-wide illustration below the attachment band and a two-line message beneath it. A simple “Thanks for celebrating with me” can work; add a name only if it remains easy to read.
The hole’s center and diameter depend on the punch, ribbon and stock. Make the hole in the blank prototype first and pull the ribbon gently through it. If the paper tears, change the construction or reinforce it appropriately before printing a batch. Moving the artwork cannot solve weak material around the hole.
For efficient hand cutting, rotate the tags to 3.5 inches wide by 2 inches high on the sheet. Two columns with a 0.25-inch gap occupy 7.25 inches; four rows with three 0.25-inch gaps occupy 8.75 inches. That gives eight tags on Letter paper if the grid fits the printer’s usable area. The finished tag remains 2 × 3.5 inches when turned upright.
Keep personalization separate from cutting. Check the guest list, export the complete batch, count the tags, then cut and attach them in a deliberate order. If a tag includes a recipient name, place it with the correct favor immediately rather than leaving an anonymous pile to sort later.
Prototype the size on plain paper
Cut two or three paper rectangles and hold them against the packaging. For a small bag, a 2 × 3-inch tag can be a useful starting example, but the handle, closure and contents may call for something narrower.
Check the tag from the front and side. It should not cover the entire gift or interfere with opening the package. If it hangs from a handle, allow for the way it turns and moves rather than judging only a perfectly posed front view.
Choose the attachment location before finalizing the artwork. A top hole, corner hole and folded-over tab each require different free space. A folded tag with a 2 × 3-inch front and an equal back starts as a 2 × 6-inch strip before any extra allowances; a single hanging tag does not need that doubled height.
Reserve the punch area
Mark a clear zone around the intended hole. Keep text and important image details outside it. Leave enough paper between the hole and the edge to resist tearing, then test the actual punch and material.
For a 2 × 3-inch prototype, you might reserve the top half-inch for attachment and place the message below. Adjust after the physical test; this is a layout example, not a guarantee of strength for every stock.
If you use a shaped tag, avoid narrow points near the hole. A simple rectangle with softened corners is often easier to produce reliably than an intricate silhouette.
Write one short message
“Thank you for celebrating with us” may be enough. Add a name or date only if it improves the keepsake or helps identify the recipient. A favor tag does not need to repeat the full invitation.
For personalized favors, make the guest’s name the most visible line. For a general thank-you, give the message that role and keep the host’s name smaller.
Proof the longest name and any accented characters before duplicating the layout. Personalization errors are easy to miss when every tag shares the same decoration.
Coordinate rather than overcrowd
Reuse one color and one image style from the invitation or packaging. Put a small illustration beside the message or at the lower edge, leaving the attachment zone clear.
Keep the words on a quiet background. If the packaging is already patterned, a simpler tag can provide useful contrast.
Test attachment on the real package
Punch and attach one tag using the actual ribbon, cord or fastening method. Check whether it tears, rotates awkwardly or prevents the bag from closing. Choose attachment materials appropriate for the recipients and avoid loose small parts where unsuitable.
For food favors, keep required ingredient and allergen information visible. A decorative tag is not a substitute for the original label or any information required for the way the food is supplied. Do not assume ordinary paper, ink or adhesive is suitable for direct food contact.
If the package contains a fragile item, the tag should not be the handle people naturally grab to lift it.
Batch only after the proof works
Count the needed tags and allow a small number of spares for damage or a corrected name. Keep printed, cut and personalized pieces in separate groups so the workflow stays organized.
For a wider event plan, see the birthday decor guide. For artwork rights, consult the current licence before selling finished favors or sharing digital files. The useful finishing touch is a tag that works on the real package, not simply one that looks polished at screen size.
Your next step
Keep the blank-name master separate from the personalized batch. Test the next bag or ribbon before assuming the same punch and attachment arrangement will work.
Start with Puppy Birthday Bakery, or choose Dinosaur Birthday Adventure for the alternative theme described above. These collections supply PNG illustrations for your own layout; the project text and construction remain yours.